Quick Start Guide
GibbsCAM software is Simply Powerful. Although GibbsCAM imposes no set sequence to creating a part, some things precede others. Here are the basic guidelines for programming with GibbsCAM.
Create or Open a Part File
Make or Modify a Model
Create Operations
Render the Part
Post the Part
1. Create or Open a Part File
You can either create a new part file or open an existing model. This is often done with the Document Control dialog (DCD), whose icon is in the Command Toolbar at the top left of the workspace. The DCD provides controls for file management, part measurements, comments and preferences, stock setup, and the like.
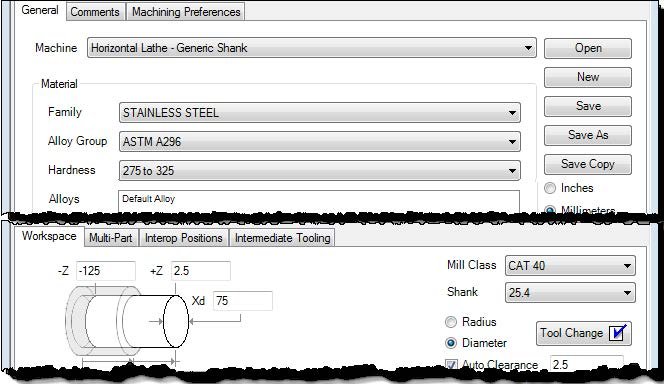
DCD (Document Control Dialog) for a lathe part.
2. Make or Modify a Model
Next, you need to make a model of your part, or to modify an existing model. Modeling is accomplished with the Geometry Creation Palette, with Solid Modeling, or a combination of the two.
3. Create Tools & Operations
Once a model is created, you apply machining functions to the part. This includes setting the available tools , defining processes, and creating operations. Creating tools can be done at any time when a part file is open. Processes and operations are created after tools are defined.

Tool Creation Dialog

Process Creation Dialog
4. Render the Part
Once operations have been defined for machining a part, the part should be rendered. This provides a visual check of the part to ensure that the results are as expected. Many errors can be caught using Cut Part Rendering (CPR) or Simulation. It can also be very useful to run the rendering as you create operations, rather than after you are finished and are about to post the part.

Cut Part Render
5. Post the Part
The last step is to generate the output from the part file and create NC-code. This is called Post Processing.

Post Processing Dialog
